Quick start: your first job end to end
Just got your ServisGo account? This is the one guide worth reading first. It walks one job through the whole system: from an empty dashboard to a booked visit, out to a technician's phone, and back as recorded, finished work.
Every step links to a detailed guide, so you can go deeper whenever you want. If you have not registered your company yet, start with setting up your company and come back here.
One system, two apps
ServisGo is used from two places, by two kinds of people:
- The dashboard
- The website you are signed into now, made for the person who plans and dispatches: creating work orders, booking visits into the calendar, and following how the day is going. Steps 1 to 4 below happen here.
- The technician app
- A free mobile app for the crew in the field. Each technician sees their own day of visits on their phone, starts and finishes work on site, and records what was done. Steps 5 and 6 show it in action.
The two stay in step by themselves: what you plan in the dashboard appears on the technicians' phones, and what technicians do on site lands back in your dashboard as it happens. The rest of this guide follows one job through that loop.
Step 1: Add your services
Services are the jobs your company offers: "Boiler maintenance", "AC installation", whatever you do. Each has a name, a default duration and a price, and once they exist, work orders almost fill themselves in.
- 1Open the Services page
Click "Services" in the sidebar on the left.
- 2Create your first services
Press the "Create Service" button in the top-right corner of the page. In the dialog that opens, fill in the "Service Name", the "Default Length" in minutes and the "Price", then press "Create". Add the handful of jobs you do most often; the rest can come later.
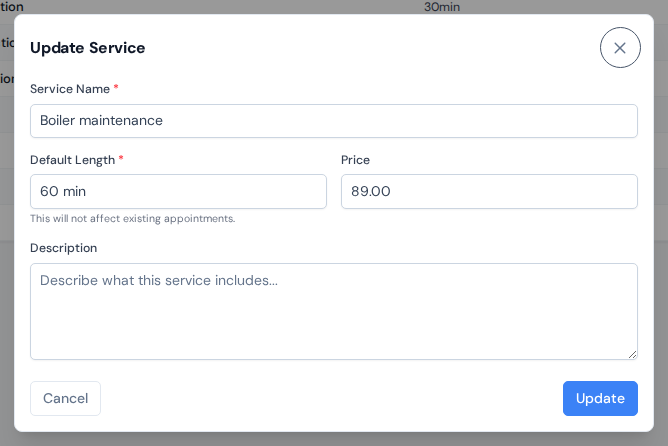
The "Create Service" dialog: a name, a default length and a price is all a service needs.
Durations, prices and who can perform what are covered in managing your service catalog.
Step 2: Create a client
Everything in ServisGo starts with a client: work orders belong to them, and visits drive to their addresses.
- 1Open the Clients page
Click "Clients" in the sidebar on the left, then press the "Create Client" button in the top-right corner of the page.
- 2Fill in the details
Enter the "Contact person" (the one person you talk to about this client's jobs) and their "Phone Number", then at least one address under "Objects": that is where the visits will drive to. Start typing the address and pick it from the list that drops down; the full address fills in with its postal code, and the green pin next to it shows the place is on the map.
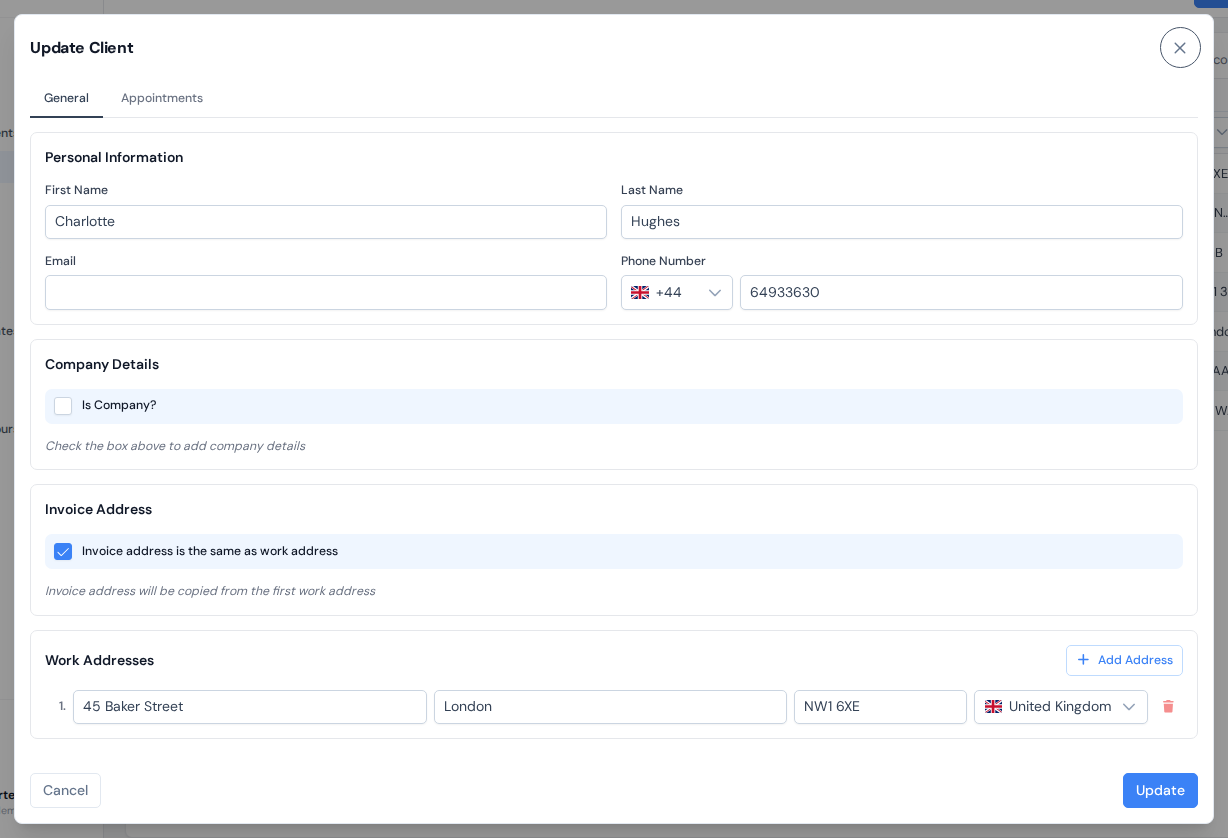
A client record: the contact person and the object visits will drive to.
Company clients, several addresses and invoice details are covered in clients and their addresses. If an address is not in the list, addresses and the map shows how to place its point yourself.
Step 3: Create a work order
A work order is one job for one client, saying what needs to be done and where. One work order can later hold several visits, so even a job that takes a whole week lives in one place.
- 1Open the form
Click "Work Orders" in the sidebar, then the "New Work Order" button in the top-right corner of the page. The "Create Work Order" dialog opens.
- 2Pick the client and address
In the "Client Information" section, choose the client in the "Client" dropdown, then their address under "Service Address".
- 3Add the services
Under "Planned services", click "Add line" and pick a service in the new row; its price and duration fill in automatically. The "Totals" row under the lines adds everything up, and the total time is how much calendar time the job will need.
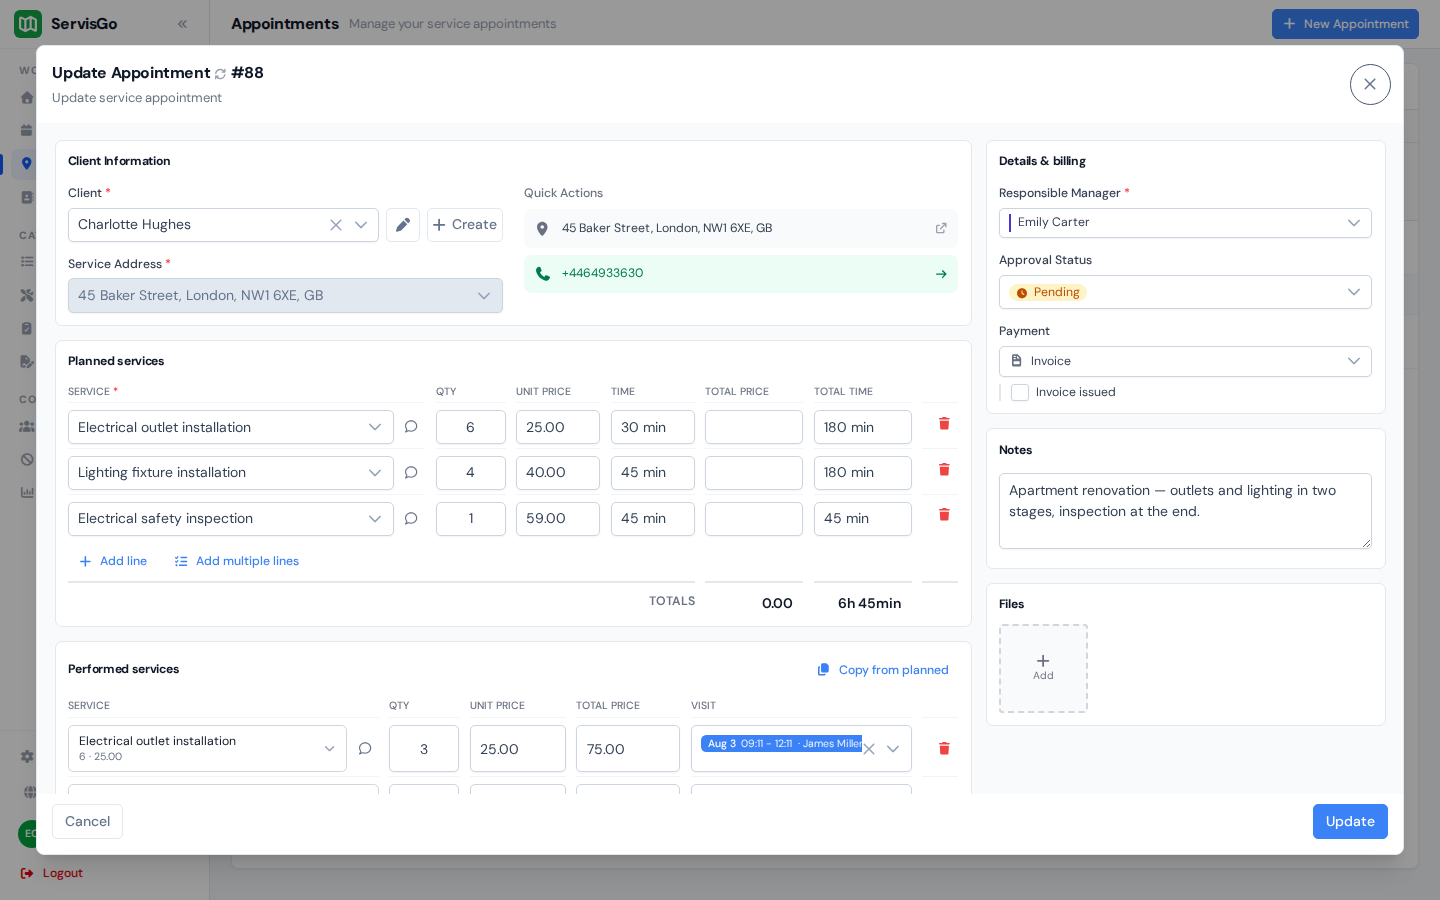
A work order: the client, the address and the planned services. - 4Save
Press "Create" at the bottom of the dialog. The new work order appears in the list with the status "Not Scheduled": it exists, but no visit is booked yet.
Planning windows, notes and adding many services at once are covered in creating a work order.
Step 4: Book the first visits
A booked visit answers when the job happens, and who drives there. Open "Calendar" in the sidebar: each technician has a column, and every work order still without a time waits behind the small arrow tab at the right edge of the screen. Click the tab, and the "Not Scheduled Work Orders" panel slides out.
Grab a work order row in the panel and drag it into a technician's column, at the time you want. Drop it, and the visit is booked: it appears as a colored block in that technician's day, and ServisGo automatically adds driving time around it based on real road distances.
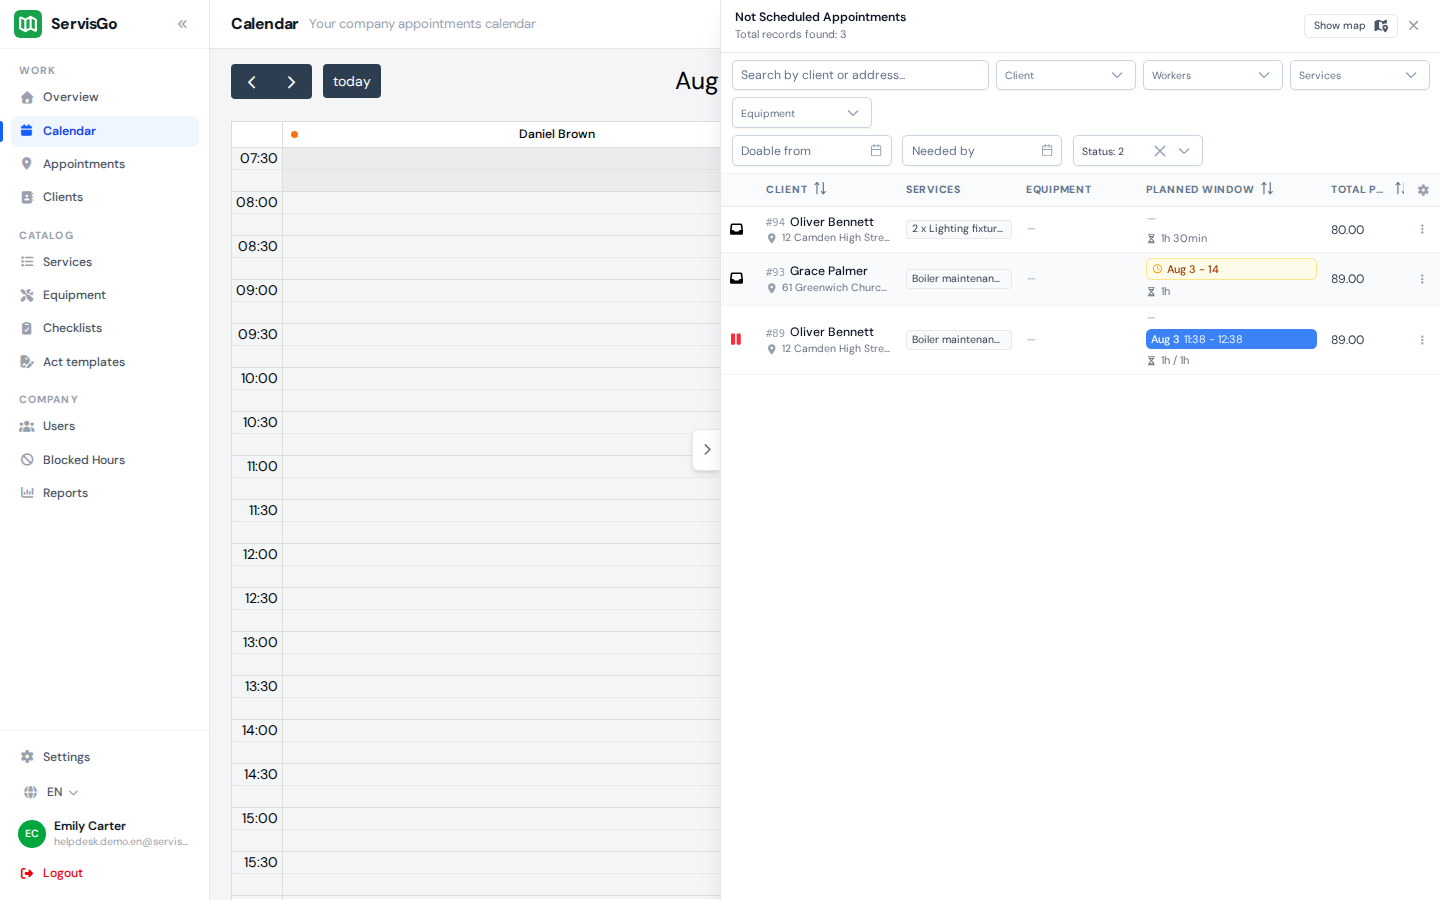
Prefer not to pick the time yourself? ServisGo can suggest the best times, weighing who can do the job and which open slot means the least driving. Both ways are covered in booking visits into the calendar; how the suggestions are ranked is in route planning.
Step 5: The technician takes over
The moment a visit lands in the calendar, it is on the technician's phone too. To get your crew in: have each technician install the free ServisGo Technician app, and give them an account with the "Worker" role under "Users" in the sidebar. The details are in the technician app guide and the team guide.
The app opens on the technician's plan: today's visits in driving order, each with the time, the client, the address and the services to do, and the rest of the week below them. No calls, no printed lists; whenever you move something in the calendar, their phone already knows.
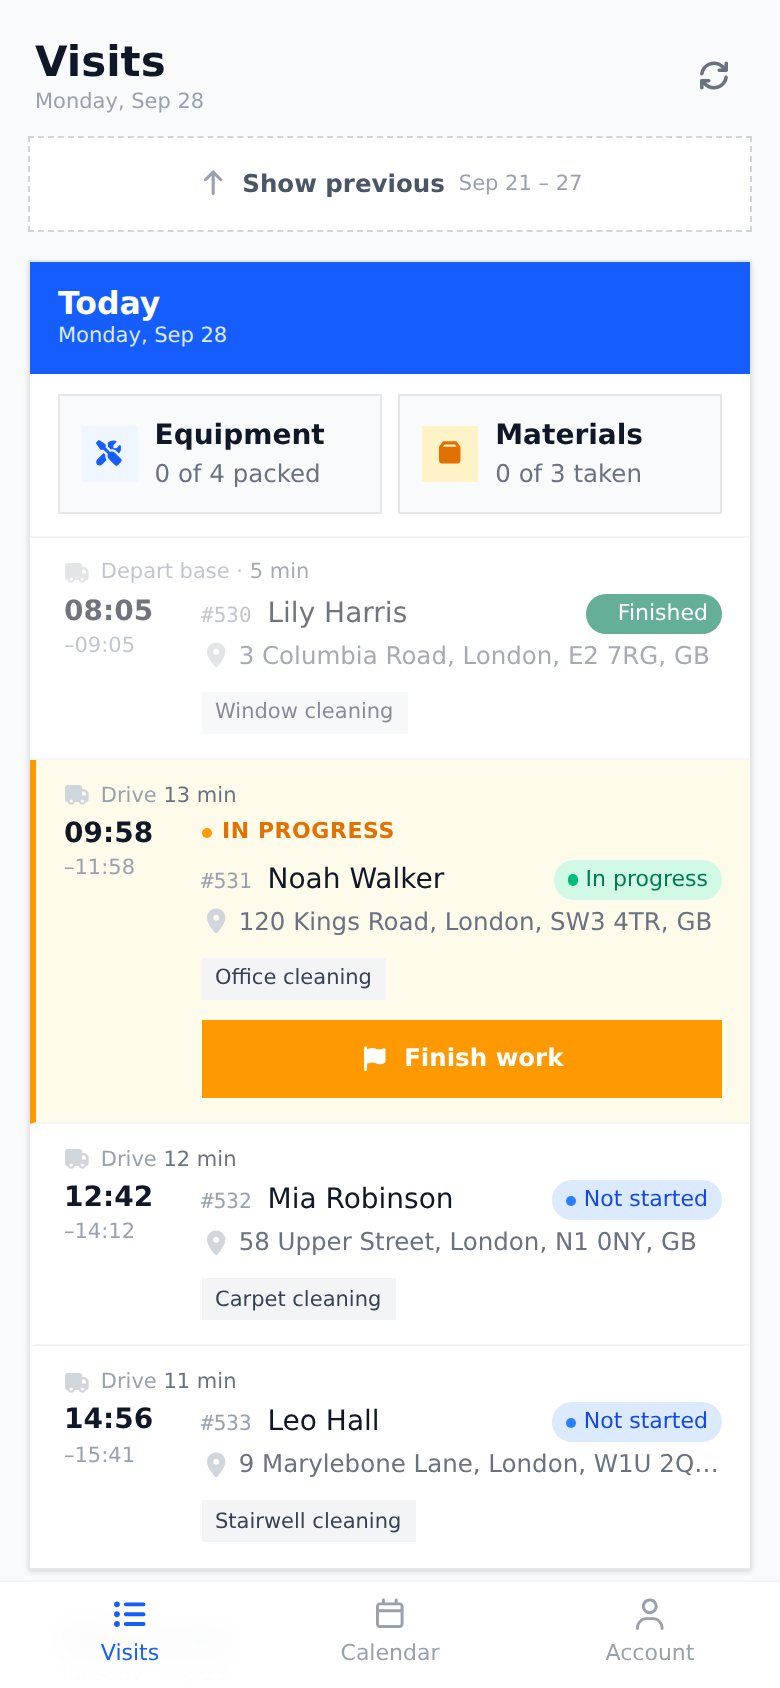
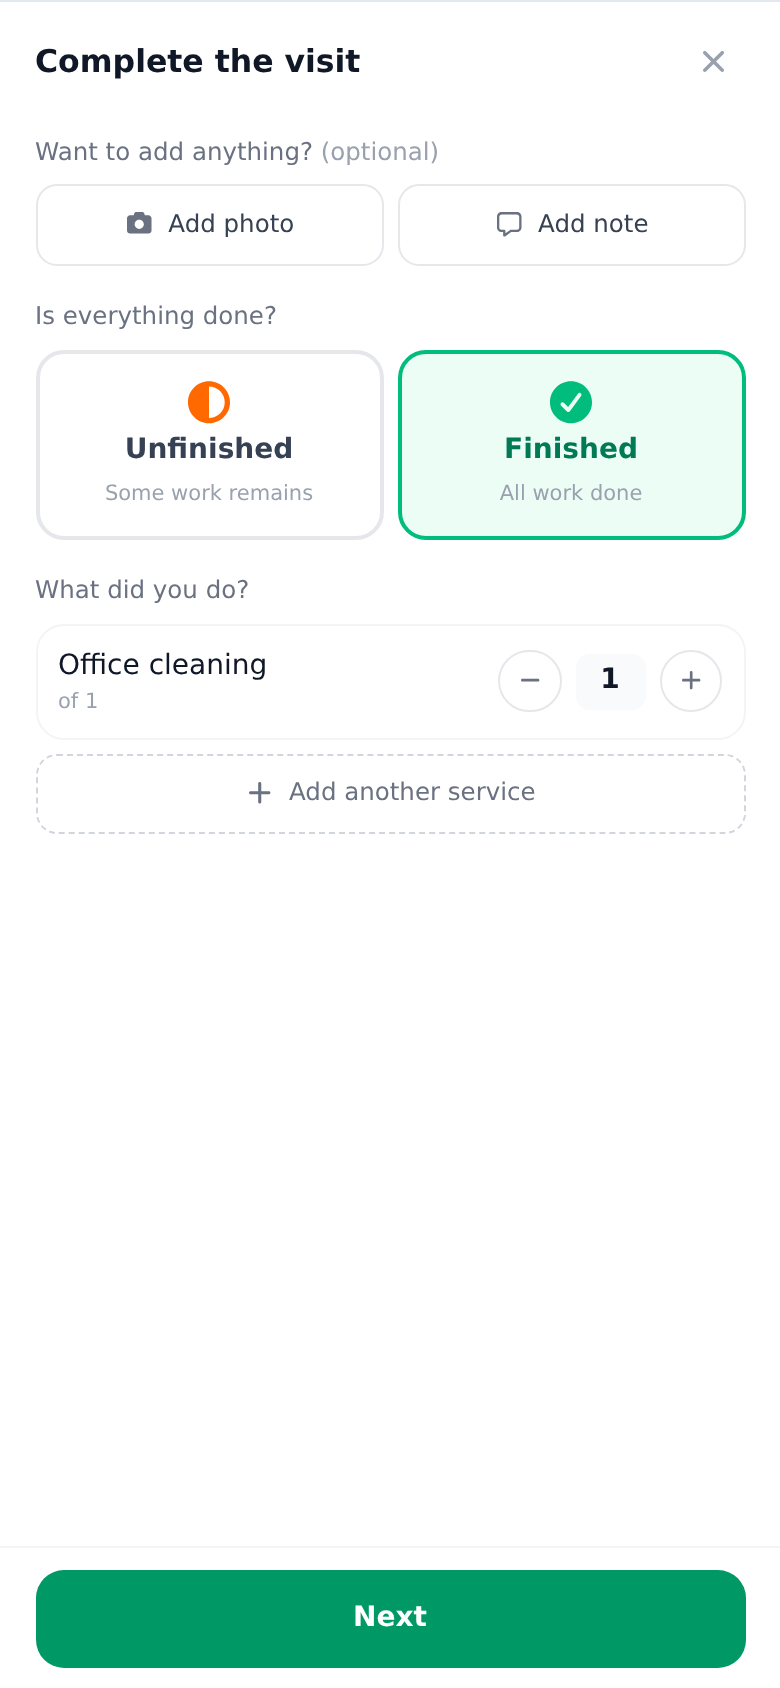
On site, the technician opens the visit and taps "Start work". At the end, they tap "Finish work" and the app sums the visit up: they pick "Finished" or "Unfinished", confirm the services actually performed, and can add a photo or a note for the office.
Step 6: Watch it all flow back
Everything the technician does lands in your dashboard as it happens. When they tap "Start work", the visit changes color in your calendar; the visit statuses guide explains the colors. The services they record appear on the work order as performed work, ready for the work summary and acts of work.
The work order closes itself too: when a visit ends "Finished" and every planned service has been done, its status flips to "Completed" on its own. The exact rules are in when a job is complete.
That is the whole loop: you plan in the dashboard, the technician works from the phone, and the job comes back done, recorded and ready to bill.
What to explore next
That is the core flow: services, clients, work orders, visits, and the technician app closing the loop. From here, a few guides are worth a look:
- Add your team: an account for every technician, with working hours and a starting address.
- Work order statuses: how a job moves from "Not Scheduled" to closed out.
- The technician app: the full tour of what your field crew sees and does on their phone.
- The dashboard tour: what everything in the sidebar does.