Setting up your company
Welcome to ServisGo! Before you plan your first work order, there are a few one-time steps: create an account, set up your workspace, and wait for a quick approval.
The sign-up is two short screens. This guide walks you through both, shows the screen you land on when you are done, and ends with the first things worth doing once you are in.
Step 1: create your account
- 1Open the registration page
Open the ServisGo dashboard. On the sign-in page, look just below the form: next to "Don't have an account?" there is a "Sign up for free" link. Click it and the registration page opens.
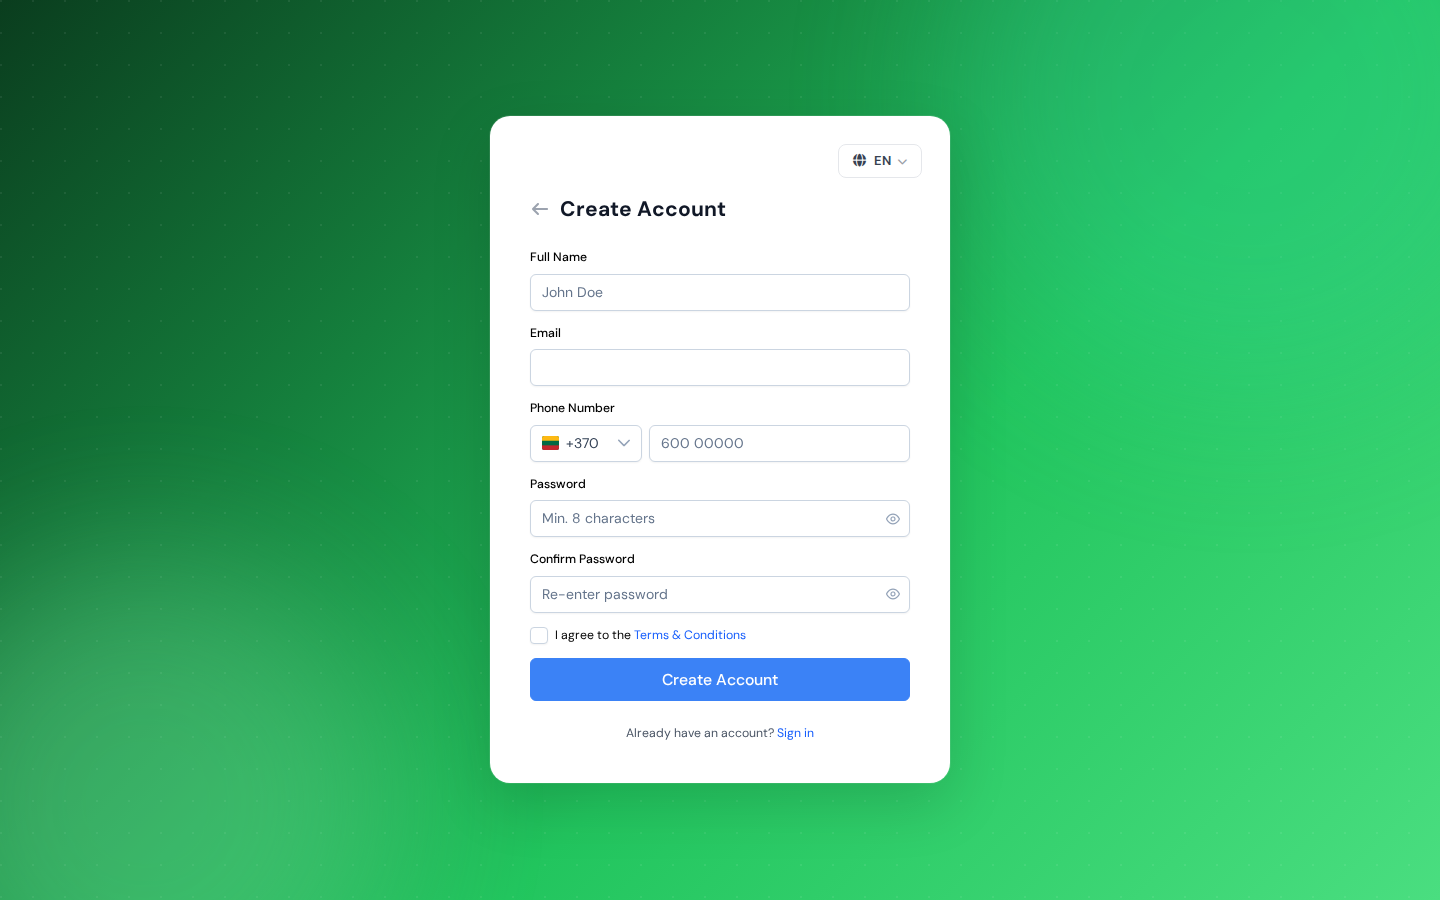
The registration page, filled in and ready to submit. - 2Fill in your details
Enter your "Full Name" and "Email". Under "Phone Number", the box on the left shows a flag and a dialling code: ServisGo picks your country automatically, and the field next to it shows an example number in the format used there.
- 3Change the country if needed
Click the flag box and a list opens: "Suggested" at the top, then "All countries" in alphabetical order. Type the first letters of a country name or its dialling code, for example "+49", into the "Search country" box to jump straight to it, then click the country.
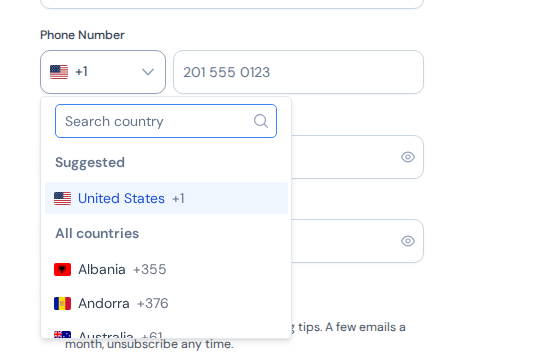
The phone country list: suggested countries first, every other country below, and a search box at the top. - 4Choose a password
Choose a "Password" of at least 8 characters and repeat it under "Confirm Password".
- 5Agree and submit
Tick "I agree to the Terms & Conditions". The second box, "Email me product updates and planning tips", is optional: tick it if you would like a few emails a month from us, and leave it empty if not. Press "Create my account" and the second step opens right away.
Step 2: set up your workspace
Right after registering you land on "Set up your workspace". It asks for one address and one question. You fill it in only once.
- 1Your work address
Start typing under "Your work address" and pick the address from the list that drops down: the full address fills in and the pin button next to it turns green, meaning the place is on the map. Take a moment to get it right: ServisGo plans travel between jobs, and every route starts here. This one address becomes both your company address and your own starting point; you can change either later in Settings. If the address is not in the list, addresses and the map shows how to set the point yourself.
- 2How many people will use ServisGo?
Pick the size of your team from the list: "Just me", "2 to 10", "11 to 20", "21 to 50", "51 to 100" or "More than 100". The answer is optional and only helps us understand how you work; leave "Choose an option" as it is if you prefer.
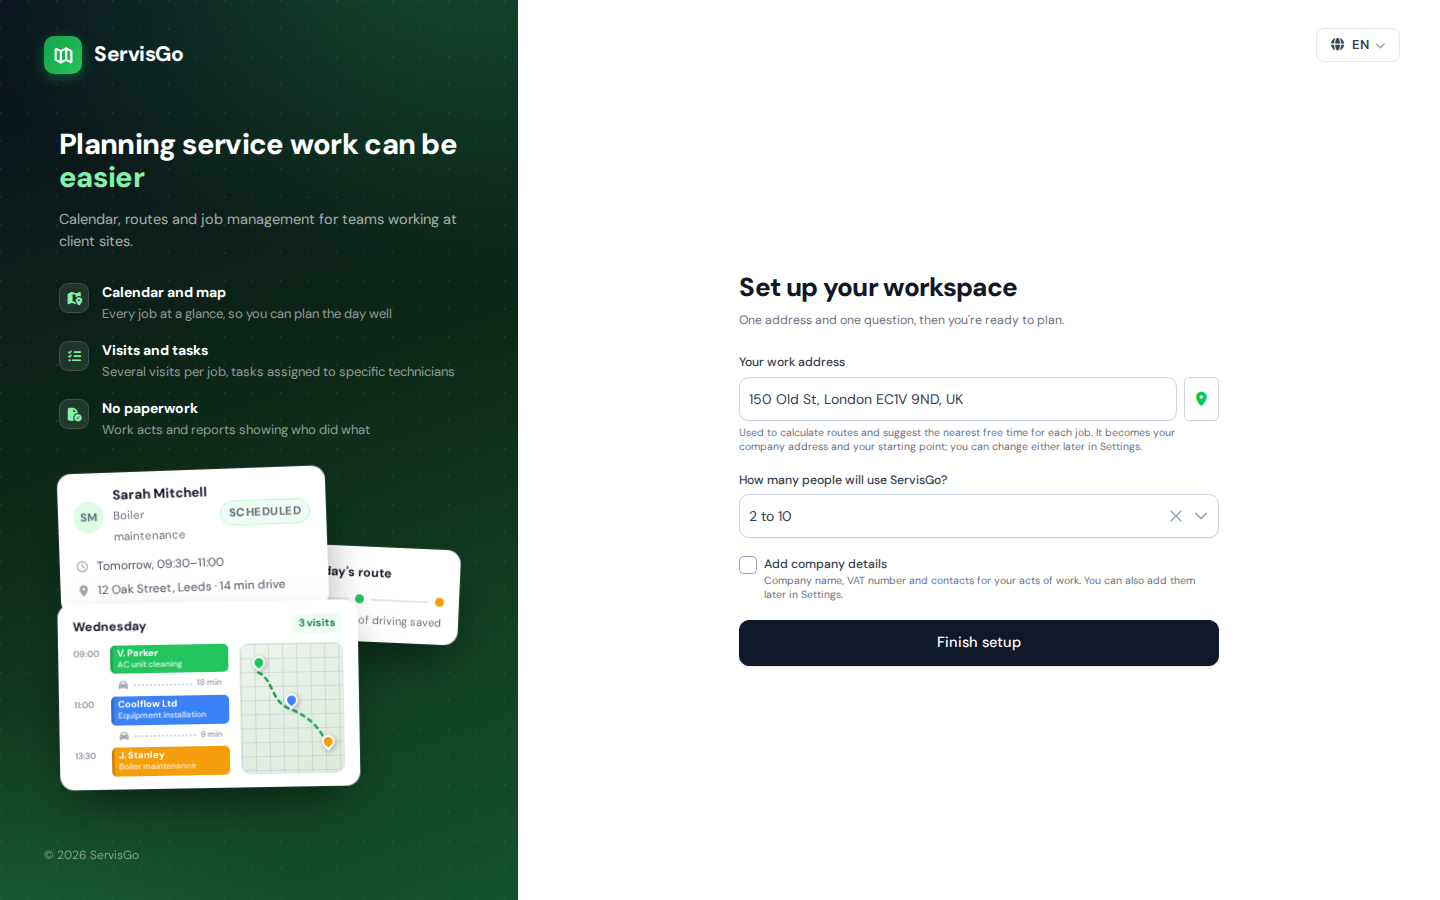
The setup page: one address and one question. - 3Add company details (optional)
Tick "Add company details" if you want your company name, registration and VAT numbers, phone and email on your acts of work from day one. The company fields appear below the box; only "Company Name" is required. Leave the box empty and ServisGo names the workspace after you; you can add the details later under "Settings".
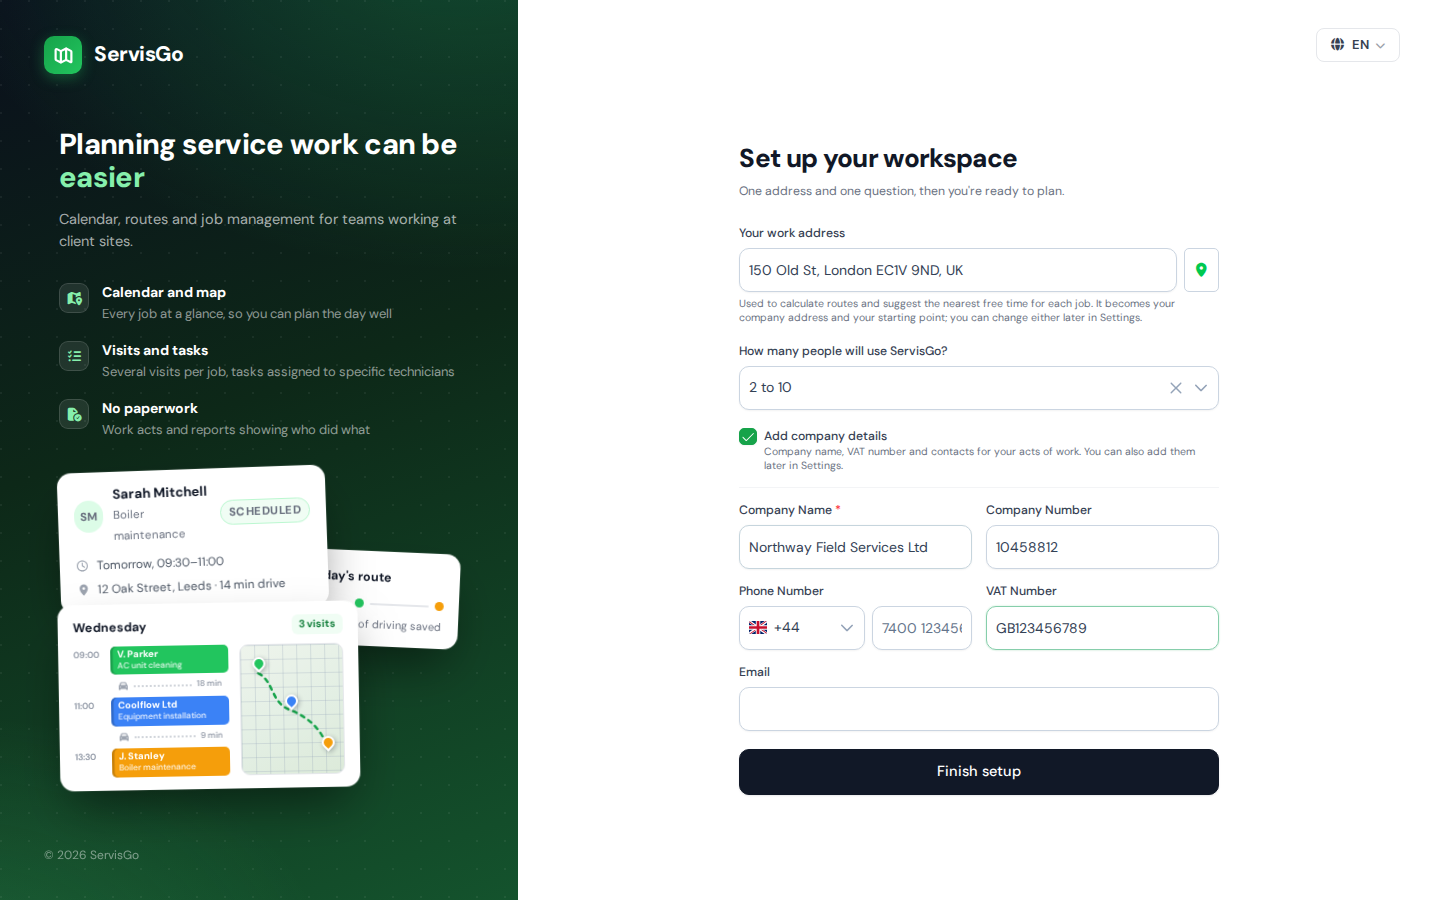
Ticking "Add company details" reveals the company fields below it. - 4Finish
Press "Finish setup".
You are all set
After the last step you see a screen headed "You're all set" with your first name, and a short confetti burst to celebrate. Our team checks every new account and activates it shortly, usually within one business day; we email you the moment it is ready.
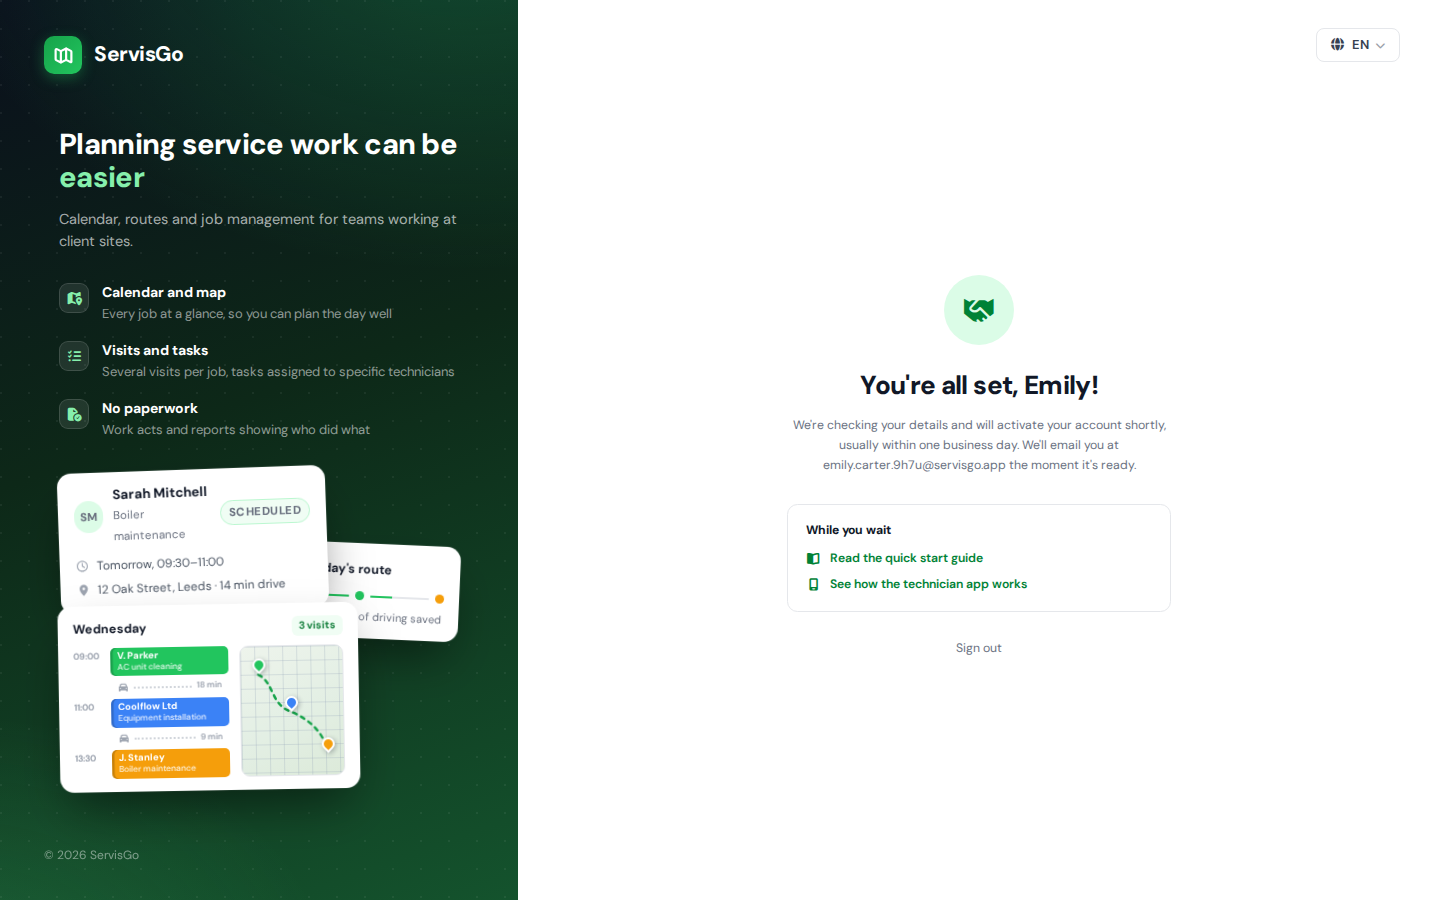
While you wait, the two links on the screen open the quick start guide and the technician app guide in this help center. If you sign in before the account is activated, the same screen greets you again, without the confetti; the "Sign out" link at the bottom takes you back to the sign-in page.
First things to do
Once your account is active, a little setup makes everything else easier:
- Add your services: the jobs you offer, each with a duration and a price. Click "Services" in the sidebar on the left, then press the "Create Service" button in the top-right corner of the page.
- Add your team: create an account for every technician, with their working hours and starting address. Click "Users" in the sidebar, then press "Create User" in the top-right corner.
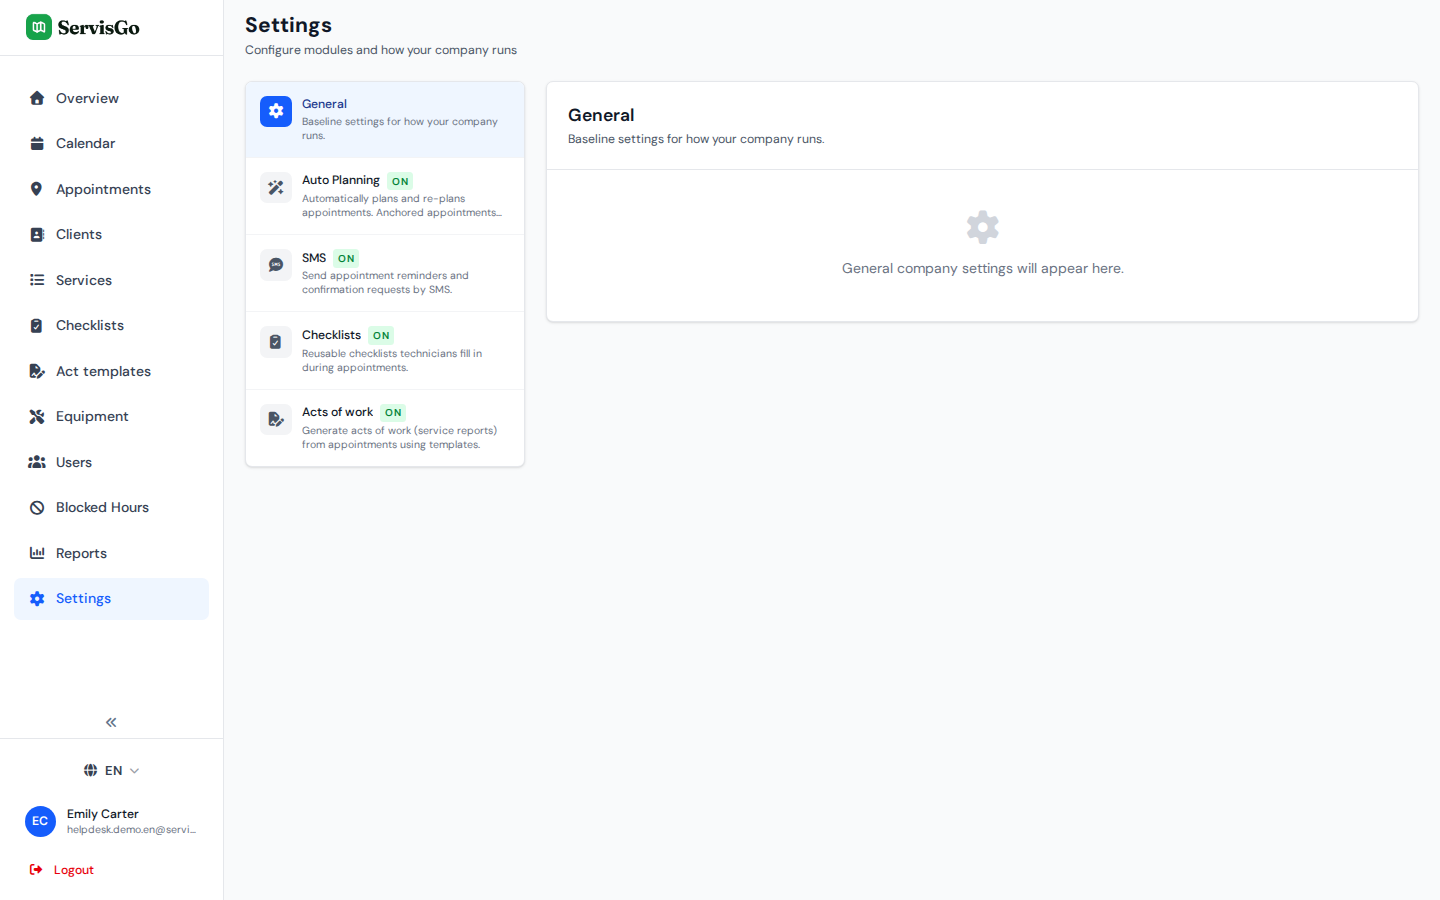
- Check your settings: click "Settings" at the bottom of the sidebar and switch on the features you want to use.
The "Settings" page lists optional features you can turn on or off at any time: "Auto Planning", "SMS", "Checklists", "Acts of work" and "Signatures". They appear as a list on the left side of the page. Click a feature and its panel opens on the right, with an "Enabled" / "Disabled" toggle switch in the panel's top corner. Flip the switch, then press "Save" at the bottom of the panel.
From here, the quick start guide takes over: it walks you from an empty dashboard to your first client, work order and booked visit.