The technician mobile app
Your technicians do not work at a desk, so ServisGo does not ask them to. The technician app puts each worker's week in their pocket: the visits day by day in driving order, what to pack for them, the route to the next address, the checklists to fill, and the work to record as done.
This guide shows how to get your technicians into the app and what their day looks like inside it. Everything they do there lands on your dashboard as it happens.
Getting your technicians in
- 1Install the app
The ServisGo Technician app is free. Have your technicians download it from Google Play or the App Store, or search for "ServisGo Technician" in the store on their phone.
- 2Give each technician an account
In the dashboard, open "Users" in the left sidebar and create an account with the "Worker" role, an email and a password. This is covered step by step in the technicians and user accounts guide.
- 3Sign in once
The technician opens the app, enters that email and password on the "Sign In" screen, and that is it. The app keeps them signed in until they log out themselves.
Their week in one list
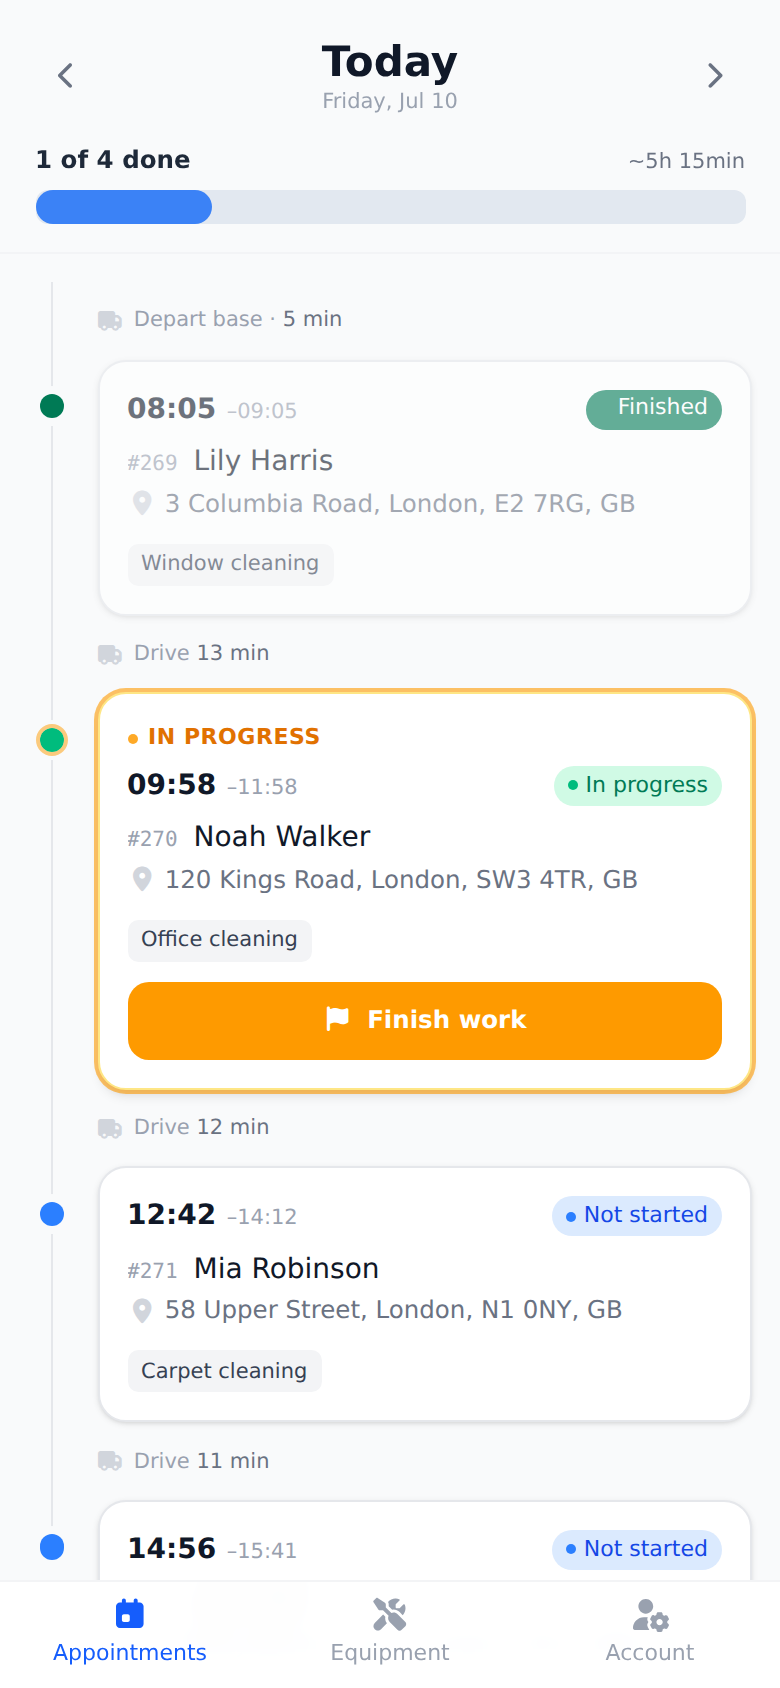
The app opens on "Visits", the first of the three tabs in the bar at the bottom (next to "Calendar" and "Account"): one list of the technician's work, split into days. Today comes first under a blue header, followed by the six days after it. Each day lists its visits in driving order. Every visit row shows the drive to get there above the start time, and next to it the client, the address, the visit's status and the services. Whenever you move things around in the calendar, their phone already knows.
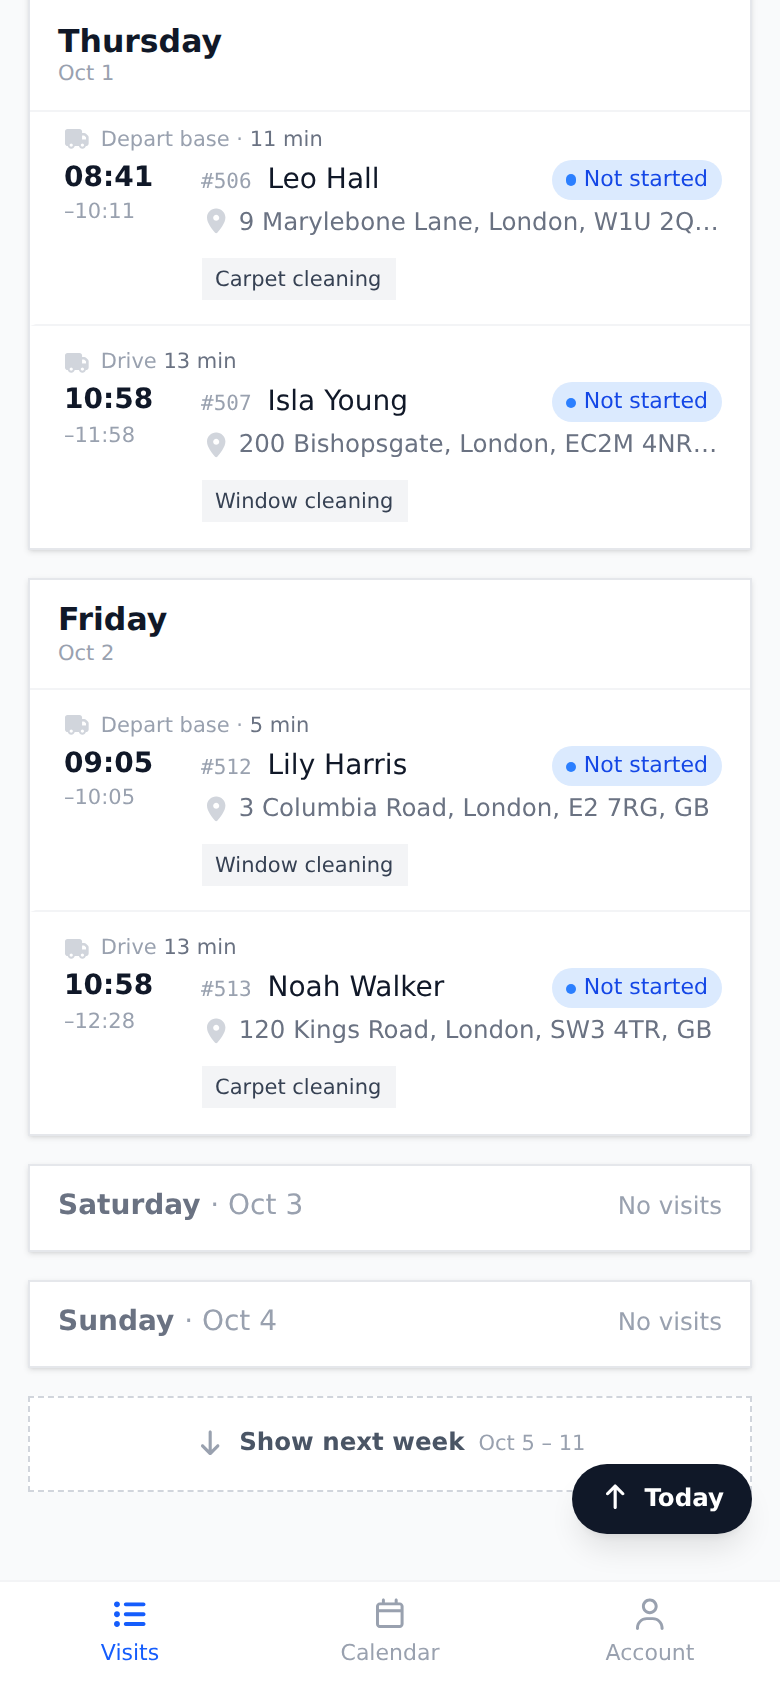
A day without visits shrinks to a single line reading "No visits", so a weekend does not push Monday off the screen. At the bottom of the list, "Show next week" adds the following seven days; at the top, "Show previous" brings back the week before. Once the list is scrolled away from today, a dark "Today" button in the bottom right corner jumps straight back to it.
What to pack for the day
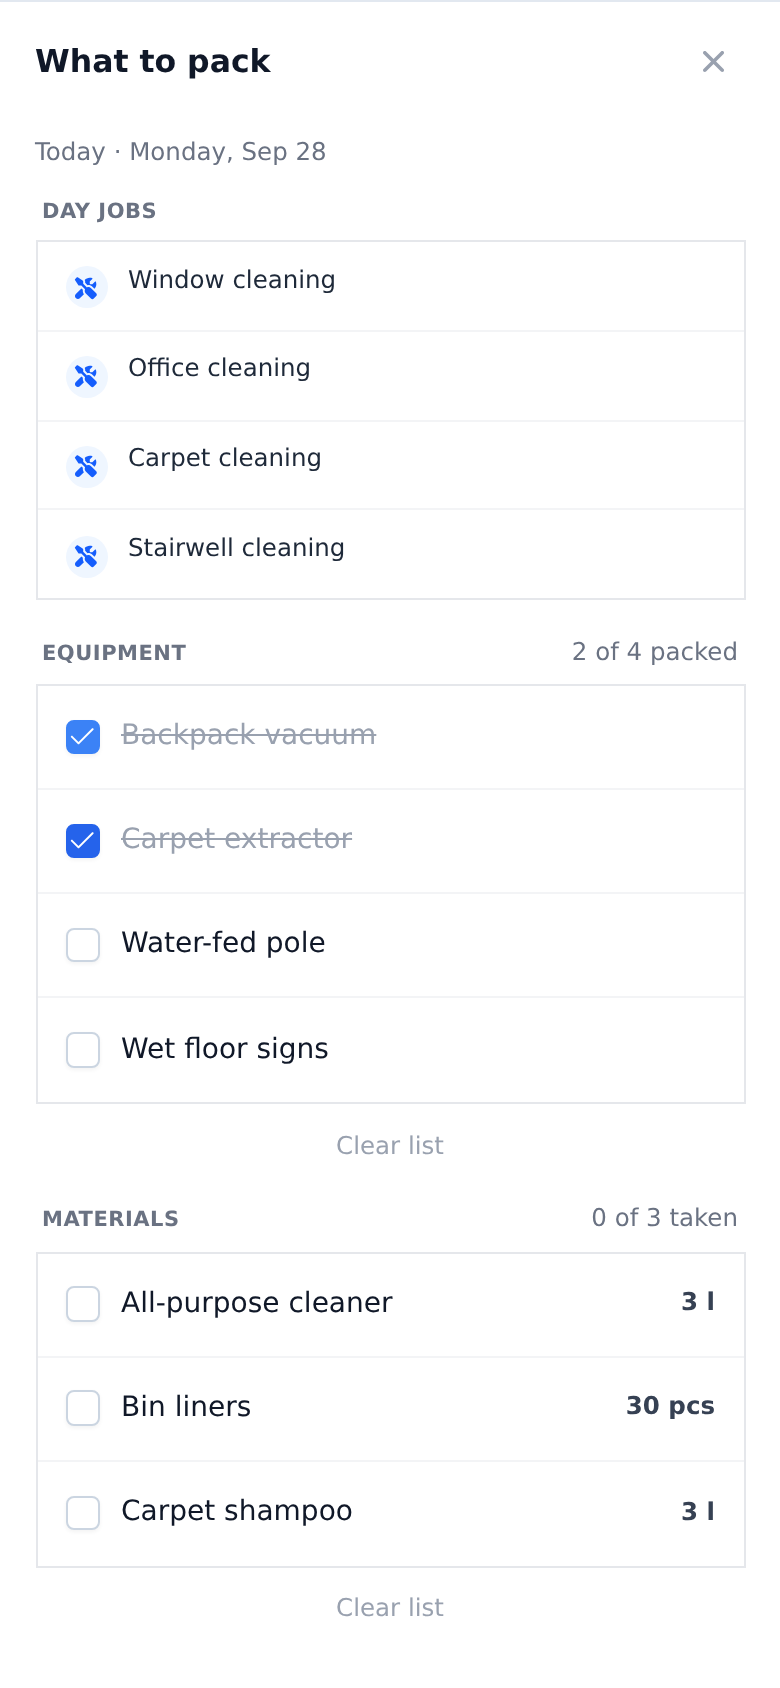
Under the header of today and of every day ahead sit up to two tiles: "Equipment" with the tools the day's work orders need, and "Materials" with the materials the office planned for them. Each tile counts what is ready, for example "0 of 4 packed" or "0 of 3 taken", and the count turns green once everything is ticked. A tile only shows when there is something on it.
Tapping either tile opens the "What to pack" list for that day. "Day jobs" at the top sums up the services of all the day's visits. Below it, the technician ticks each tool and each material as it goes into the van; materials show the planned amount, added up across the day's work orders. "Clear list" under each list removes all its ticks. The ticks are kept on that phone only and never reach the dashboard.
Both lists come from the work orders you plan in the dashboard. Open the work order for editing: right-click its visit in the calendar and pick "Edit", or open the three-dot menu at the end of the work order's row on the "Work Orders" page and pick "Edit". The tools picked in the "Equipment" field land on the equipment list. The rows of the "Materials" section (shown while the materials module is switched on) land on the materials list until a visit records them as used; a work order whose visit that day is already over drops out of it.
A visit left running
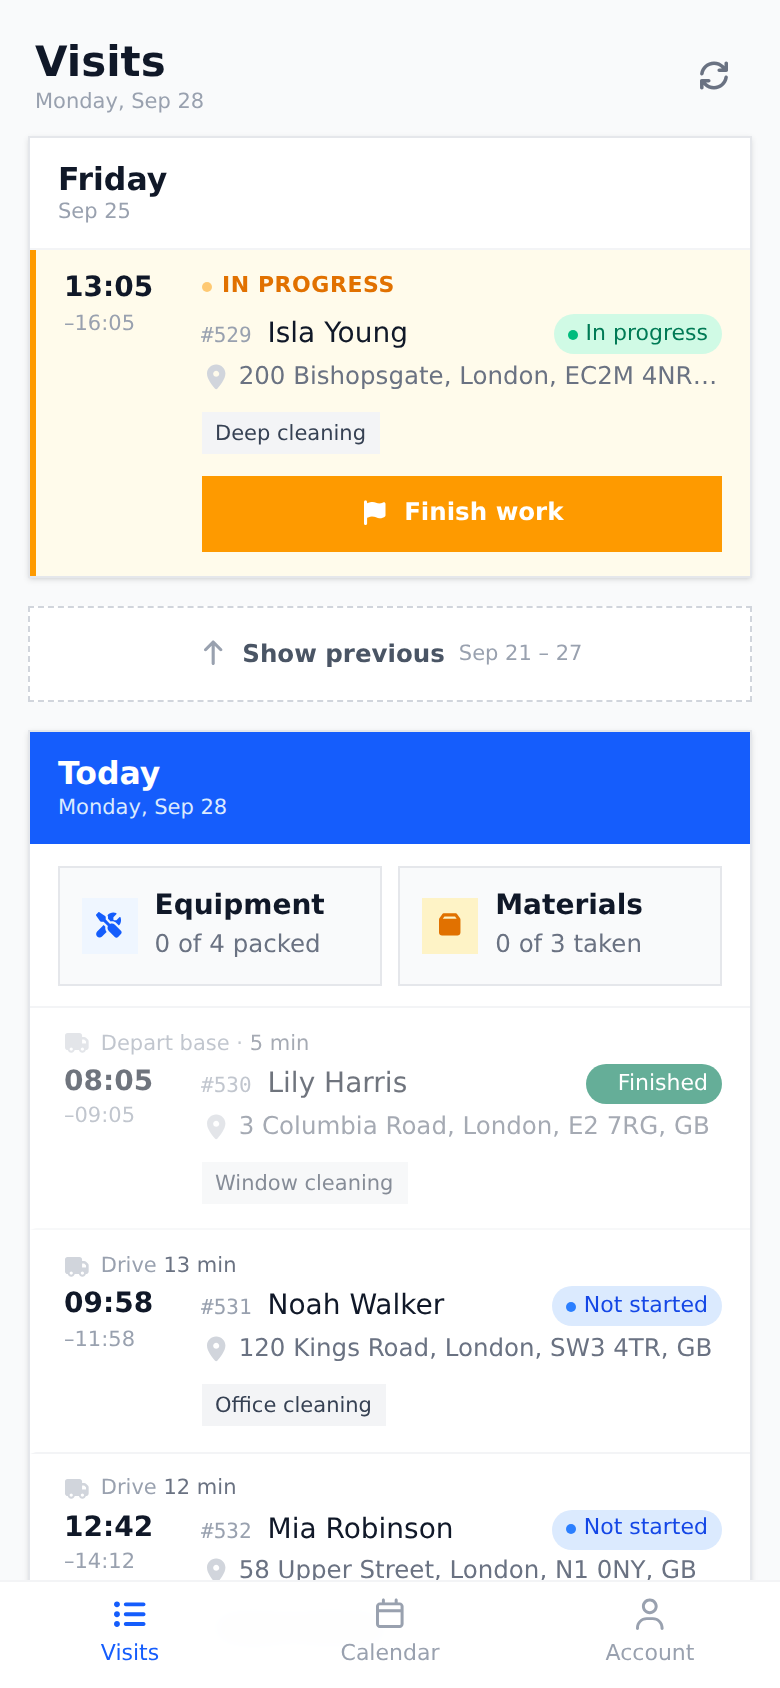
It happens: a technician starts a visit and drives off without tapping "Finish work". The app does not start a new visit while another one is still running, so a forgotten one would block the next job. That is why a visit from an earlier day that is still "In progress" is pinned to the very top of the list, above "Show previous" and today, however long ago it was. Its "Finish work" button is right there on the card, and the visit leaves the top as soon as it is finished.
On your side, the calendar keeps showing that visit as "In progress" on its own day. If the technician cannot close it, you can: click the visit in the calendar, click the status badge on the "Visit" row of the card that opens, and pick the right status. The visit statuses guide walks through it with pictures.
The month calendar
The "Calendar" tab in the bottom bar shows the technician's month on one grid. Every day carries a small dot per visit (up to four, with a "+" count for the rest), colored by the visit's status. The legend under the grid names the colors: "Not started", "In progress", "Finished" and "Unfinished". A red dot in the corner of a past day, "Left running" in the legend, marks a visit that is still in progress there. On a tablet the cells are wide enough to list the visits' start times and clients instead of dots.
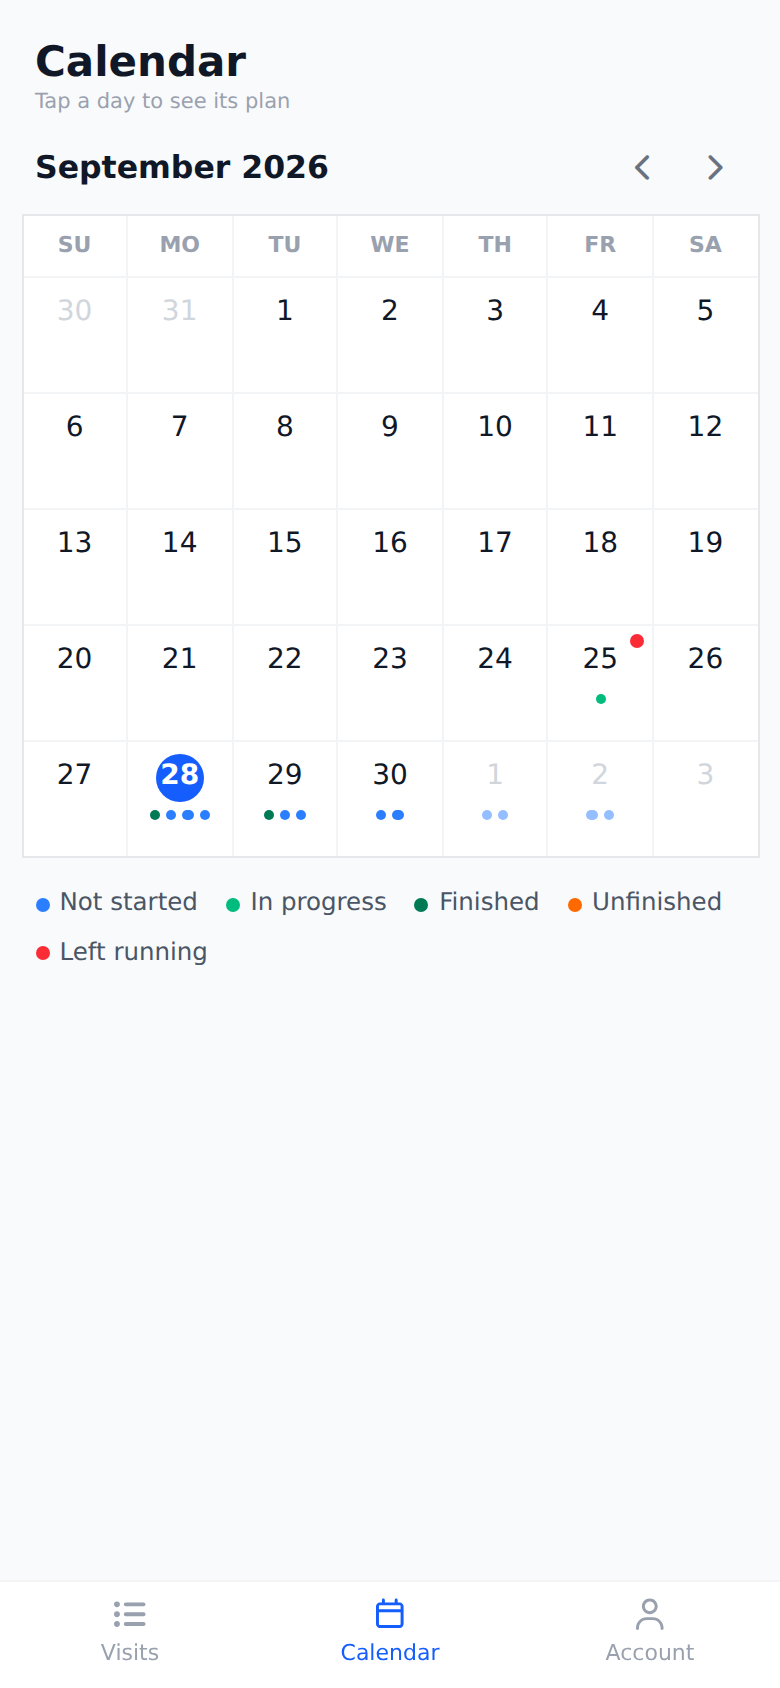
The arrows next to the month's name step one month back or ahead, as far as the previous and the next month. While another month is shown, a "Today" button next to them brings the current one back. Days of the neighbouring months stay grey and cannot be tapped.
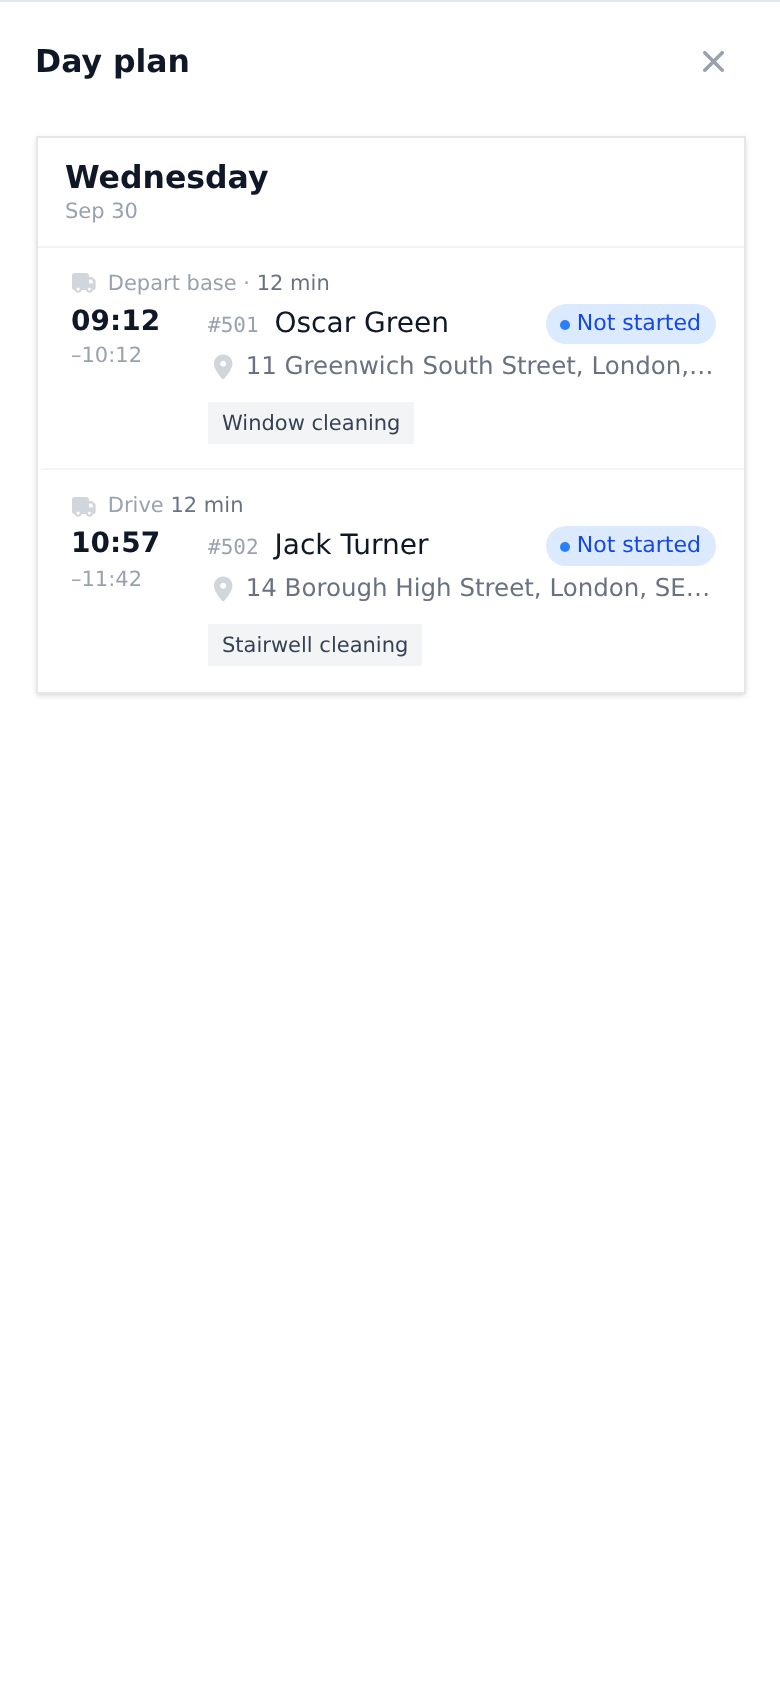
Tapping a day opens its "Day plan" over the whole screen: the same day as on the "Visits" tab, with its packing tiles and every visit. Tapping a visit opens it, and going back from the visit returns to the day plan. The X in the top right corner closes it.
On site: start, work, record
Tapping a visit opens everything about it: the client with a "Call" button (it dials the contact person picked on the work order, see creating a work order), the address with a "Navigation" button that opens the phone's maps right at the address's pin, the "What to do" list of services, the office's "Notes", and the "Files" attached to the job. An address without a pin (the ones the dashboard marks with a red pin) shows "Navigation" greyed out.
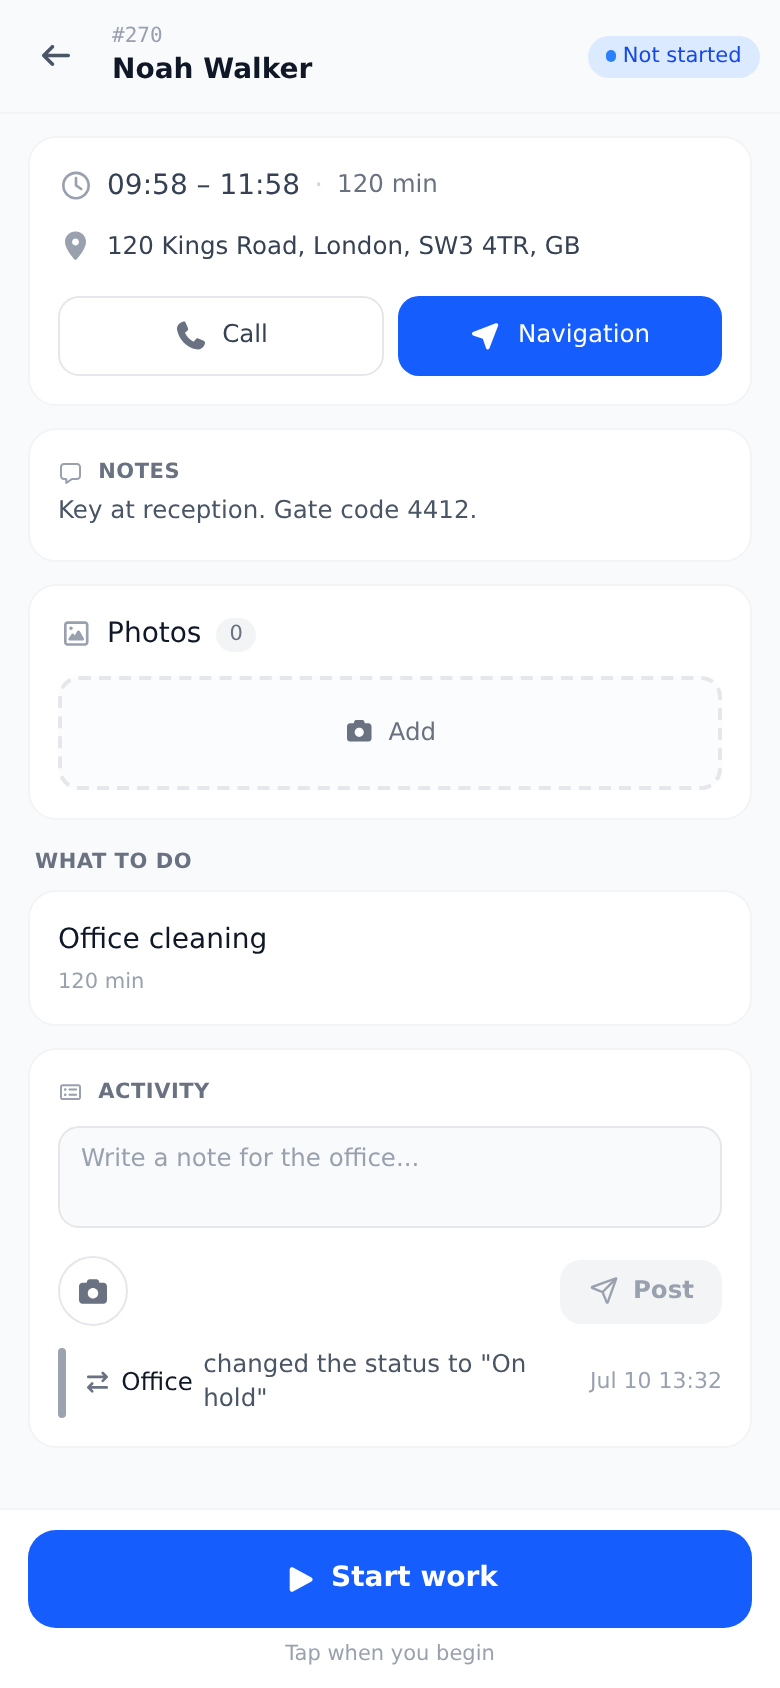
When the technician arrives and taps "Start work", the visit turns to "In progress" in your calendar that very moment. No call to the office needed; the calendar colors tell you how the day is going. See the visit statuses guide.
Finishing a visit
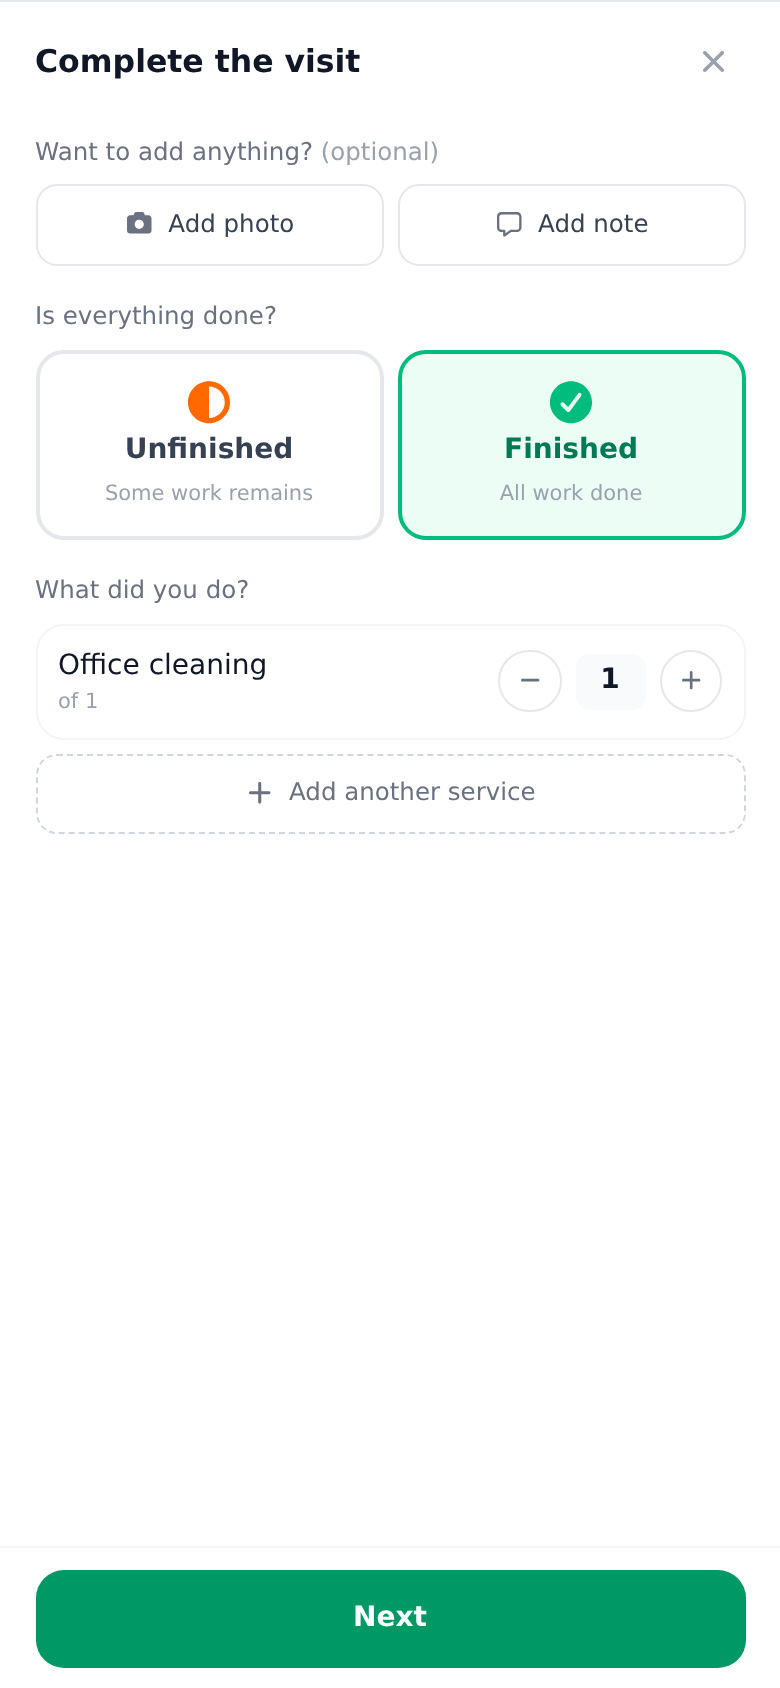
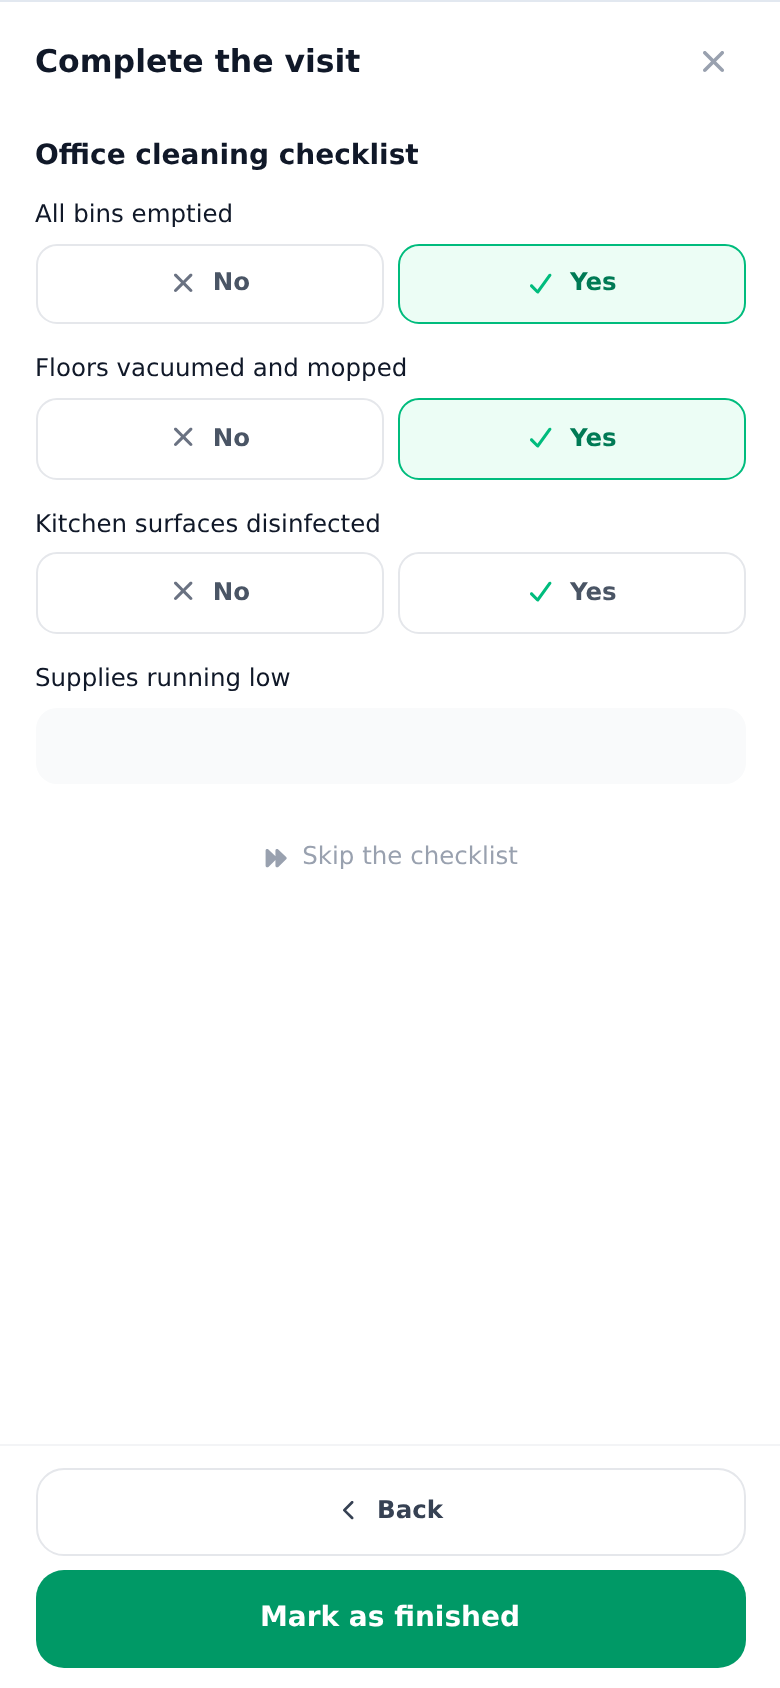
At the end, the technician taps "Finish work". If the job has checklists attached, the app walks through them first. Then the "Complete the visit" sheet sums the visit up:
- "Is everything done?": the technician picks "Finished" (all work done) or "Unfinished" (some work remains, so the office knows a return visit is needed).
- "What did you do?": the services actually performed, with their amounts. The plan is prefilled, so usually this is just a glance and a confirm.
- When the job collects cash, the sheet asks "Cash collected?".
- A photo or a note for the office can be added right there.
On the visit that closes the whole job, one more step can appear: the technician picks who is on site from the object's contact persons, checks the prefilled name (and the email address the act of work will be sent to), and the client signs right on the phone. That step and its variants have their own guide.
Everything recorded here lands on the work order as performed work, ready for the work summary and the act of work. Nothing gets rewritten in the evening.
Checklists and files from the field
Checklists attached to the work order are filled right in the app: readings, yes/no checks, photos where the checklist asks for them. Required questions must be answered before the visit can be closed, so nothing gets skipped in a hurry.
The "Files" card holds everything attached to the job, both ways: photos and documents added at the office are there to read, and the technician adds photos or files from the site through the paperclip button. Everything lands on the work order by itself. The "Activity" feed at the bottom of the visit carries notes both ways too: the technician writes into "Write a note for the office...", and comments from the dashboard show up on the phone.
What you see at the office
You follow the whole day without a single phone call. Visit statuses color your calendar live, recorded services appear on the work order, checklist answers arrive as they are saved, and every start, finish, photo and note lands in the work order's activity feed with a name and a time.